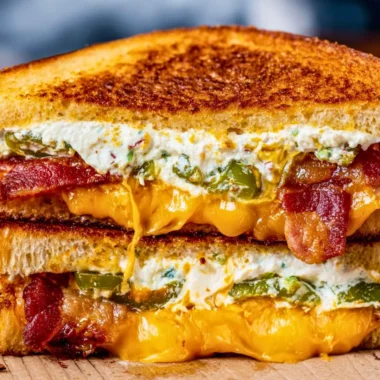

Grilled Cheese Roll-Ups: The Perfect Cozy Comfort Food
As the days grow shorter and the evenings chillier, nothing seems to invite warmth quite like the gooey, melty goodness of a grilled cheese sandwich. There’s something so comforting about sinking your teeth into a bite of crispy, golden bread filled with creamy, rich cheese. For me, grilled cheese always brings to mind moments spent in cozy kitchens, afternoons with my grandmother, who would whip up our favorite sandwich, and laughter shared around the table.
That’s why I’m absolutely thrilled to share my recipe for Grilled Cheese Roll-Ups — a fun, whimsical twist on a classic that makes for an easy weeknight dinner or a delightful snack. These roll-ups are perfect for both adults and little ones, making them the ultimate crowd-pleaser. Trust me, this is one you’ll definitely want to pin for later!
Why You’ll Love This Recipe
- Quick and simple: Perfect for busy weeknights, you can whip these up in under 15 minutes!
- Kid-friendly: Kids will love the fun hand-held shape and cheesy goodness.
- No-fuss: Perfect for minimal kitchen cleanup; the whole family will enjoy!
- Customizable: Whether you prefer classic cheese or a hearty twist with ham, the options are endless!
- Perfect for any occasion: Whether it’s a cozy dinner at home, a snack while binge-watching your favorite show, or a delightful lunch, these roll-ups fit right in.
Ingredients You’ll Need for Grilled Cheese Roll-Ups
Gather These Simple Ingredients:
- 6 slices of bread
- 1 cup thinly shredded cheese (your favorite kind!)
- 6 thinly sliced ham (optional, but oh-so-good!)
- 2 tbsp of butter
Let’s Make It Together
Now that we have our delicious ingredients prepped, let’s dive into the fun of making our Grilled Cheese Roll-Ups!
Trim the crust off each slice of bread to create a soft, chewy base.
Roll the bread flat with a rolling pin or your hands, making it easy to roll.
Sprinkle the shredded cheese on top, adding the sliced ham for an extra layer of heartiness if you’d like.
Roll it up tightly, tucking in the cheese as you go. Secure with toothpicks if needed to keep the roll from unraveling.
Heat a skillet over medium to medium-low heat and add the butter, letting it melt beautifully in the pan.
Carefully place the grilled cheese roll-ups in the warm skillet and cook for about 5 to 8 minutes. Using tongs, gently turn them every couple of minutes, watching for that gorgeous golden brown color.
Once they’re golden and melted to perfection, remove them from the skillet. Cut them in half if you prefer smaller bites and serve warm!
Delicious Variations to Try
These Grilled Cheese Roll-Ups are incredibly versatile! Here are a few fun ways to customize them:
Spice it up: Add a dash of zesty pepper jack cheese for a kick of heat.
Veggie twist: Incorporate spinach or roasted red peppers to make your roll-ups extra colorful and nutritious.
Sweet and savory: Try adding slices of apple or pear along with your cheese for a delightful contrast.
Breakfast style: Swap regular cheese for cream cheese then add scrambled eggs and a sprinkle of chives for a cozy breakfast treat!
Chef Emma’s Helpful Tips
Make-ahead magic: You can prepare these roll-ups ahead of time and store them in the refrigerator, wrapping them in plastic. Just warm them up in the skillet when you’re ready to enjoy!
Ingredient swaps: Don’t have ham on hand? Try turkey bacon or even omit it entirely for a classic grilled cheese experience.
Cutting tip: For a cleaner cut, allow the roll-ups to cool slightly before slicing. This helps the cheese set and prevents oozing!
Storage advice: If you happen to have leftovers (which is rare!), store them in an airtight container in the refrigerator for up to 2 days. Reheat them in the skillet for that crispy texture!
What’s Inside – Nutrition Breakdown
- Serving Size: 1 roll-up
- Calories: 200
- Carbs: 24g
- Sugar: 2g
- Fat: 10g
- Protein: 8g
- Sodium: 500mg
Frequently Asked Questions
Can I make this ahead?
Absolutely! These roll-ups can be prepped in advance and stored in the fridge.
Can I use different ingredients?
Definitely! Feel free to mix it up with your favorite cheeses or additional fillings.
How do I store leftovers?
Store in an airtight container in the refrigerator for up to 2 days.
How long does it last?
Best enjoyed fresh, but leftovers can last a couple of days in the fridge!
Wrapping It Up
There’s something undeniably cozy about Grilled Cheese Roll-Ups that take me back to my childhood while also delighting the family today. Whether you opt for the classic cheese or add a twist with ham, this recipe brings warmth, comfort, and a sprinkle of joy into any mealtime.
Save this Grilled Cheese Roll-Ups recipe to your Pinterest board so it’s ready when you need a cozy treat! Here’s to creating delicious memories around the table, one cheesy roll at a time. Happy cooking!